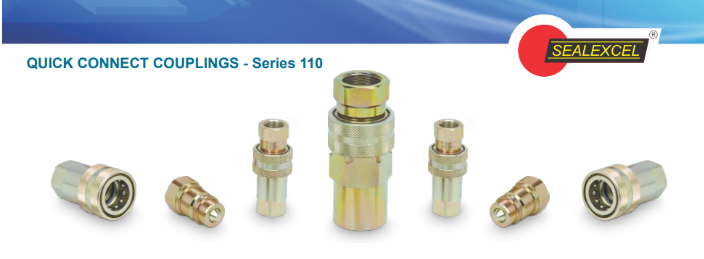
Mastering the Art of Connection: A Comprehensive Guide to Pipe Coupling Types
January 6, 2024Methods of Coupling Pipe Fitting for Newbies
Welcome to the world of plumbing and pipe fittings! If you’re just starting out, getting familiar with coupling pipe fittings is a fantastic stepping stone into this craft. These fittings might seem daunting at first, but fear not, as we’ll take a stroll through the basics and a few essential techniques to help you get started.
Understanding Coupling Pipe Fittings
First things first, what exactly are Coupling Pipe Fittings? Simply put, they are connectors used to join two pipes together in a straight line. They come in various sizes and materials, making them versatile for different applications.
Types of Coupling Pipe Fittings
Before diving into techniques, let’s explore the different types:
- Rigid Couplings: These are sturdy and require a wrench for installation.
- Flexible Couplings: They offer a bit of flexibility, useful when pipes might not align perfectly.
- Compression Couplings: Known for their ease of installation, they use compression to secure pipes together.
- Flanged Couplings: These use bolts and gaskets for a tight seal, ideal for higher-pressure systems.
Essential Techniques for Beginners
1. Measuring and Preparation
Accurate measurements are crucial. Measure the pipes you’re working with and ensure they’re clean and free of debris. A smooth surface ensures a better seal.
2. Choosing the Right Coupling
Select the coupling that matches the material and size of your pipes. Take note of any specific requirements for your project.
3. Proper Alignment
Align the pipes properly before installing the coupling. They should fit snugly together without any force. A misaligned coupling might cause leaks or fitting issues later on.
4. Installation Steps
- Apply Lubricant: Use a suitable lubricant on the coupling’s gasket or inner lining to ease installation.
- Slide On: Carefully slide the coupling onto one pipe, ensuring it’s centered.
- Second Pipe: Slide the second pipe into the other end of the coupling. Make sure it’s inserted fully.
- Tighten: If it’s a rigid coupling, use a wrench to secure it. For other types, follow the specific instructions provided.
5. Testing for Leaks
Once installed, test the joint for leaks. Turn on the water and carefully inspect the area 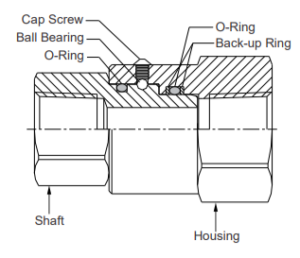
Tips for Success
- Patience is Key: Rushing through installations often leads to mistakes. Take your time to ensure everything fits properly.
- Use the Right Tools: Having the correct tools for the job makes a significant difference in the ease and quality of the installation.
- Consult Experts: Don’t hesitate to seek advice or guidance from experienced professionals or resources if you’re uncertain.
Conclusion
Starting out with coupling pipe fittings might seem challenging, but it’s a skill that grows with practice. Remember, mistakes happen, and they’re opportunities to learn and improve. Mastering these techniques will lay a solid foundation for your journey into the world of plumbing and fittings. Keep experimenting, keep learning, and soon enough, you’ll be a pro!
Happy plumbing!

